Decorating With Dishes: A Modern Take On the Classic Plate Wall + How to Install

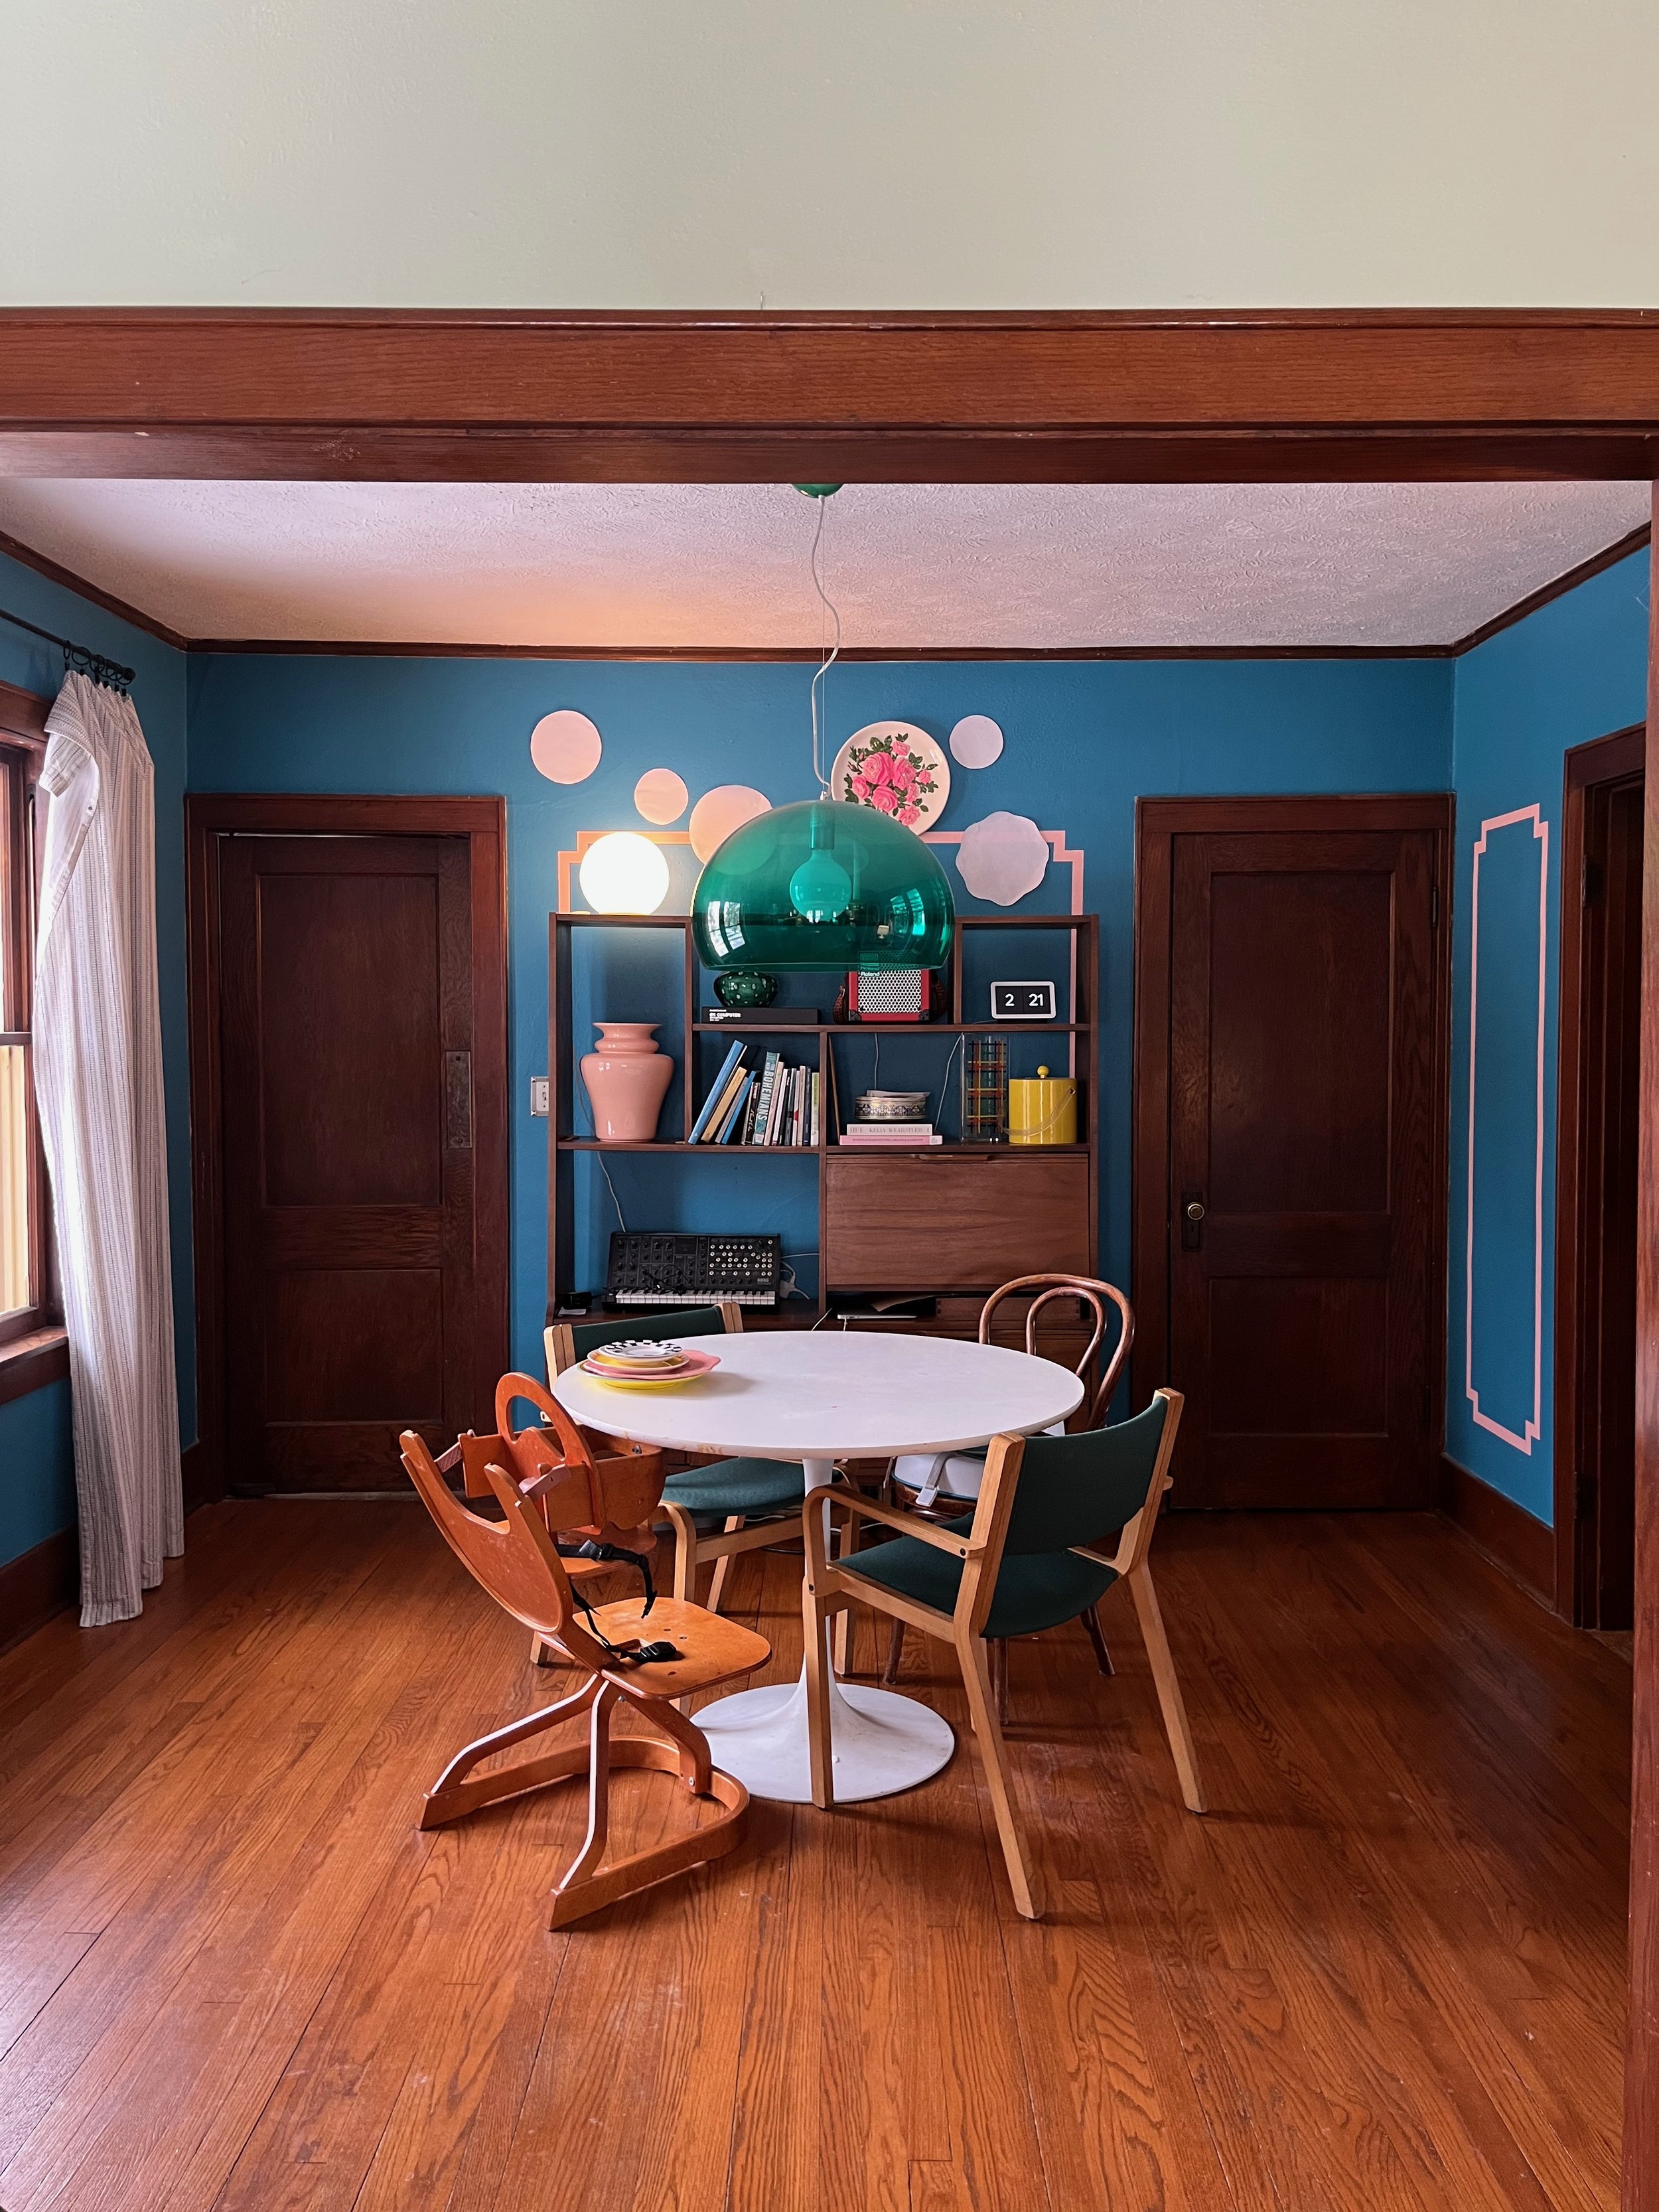
I mentioned in the dining room reveal post how decorating the wall behind our hutch often plagued me. It’s very focal, one of the first places your eye rests when you walk through the front door. But it’s also obscured behind an acrylic green light fixture. My go-to has been to hang a piece of art off center, attempting to keep it unobstructed, but that leaves the rest of the area feeling unintentionally sparse. As a result, the top of the hutch incrementally became buried with various tchotchkes in my efforts to fill in what I felt was lacking.


It wasn’t working and I kept coming back to this idea: instead of a bunch of little things on top of the hutch, what I needed was a statement idea on the wall. That’s when I started thinking about plates as decoration. They’re often seen in traditional settings in a formal/symmetrical arrangement – a look I love – but in our colorful bungalow I knew I needed a less genteel approach. Luckily, I’d been sitting on an assortment of colorfully kitschy plates collected over the years; all that was required was the hardware to complete this project.


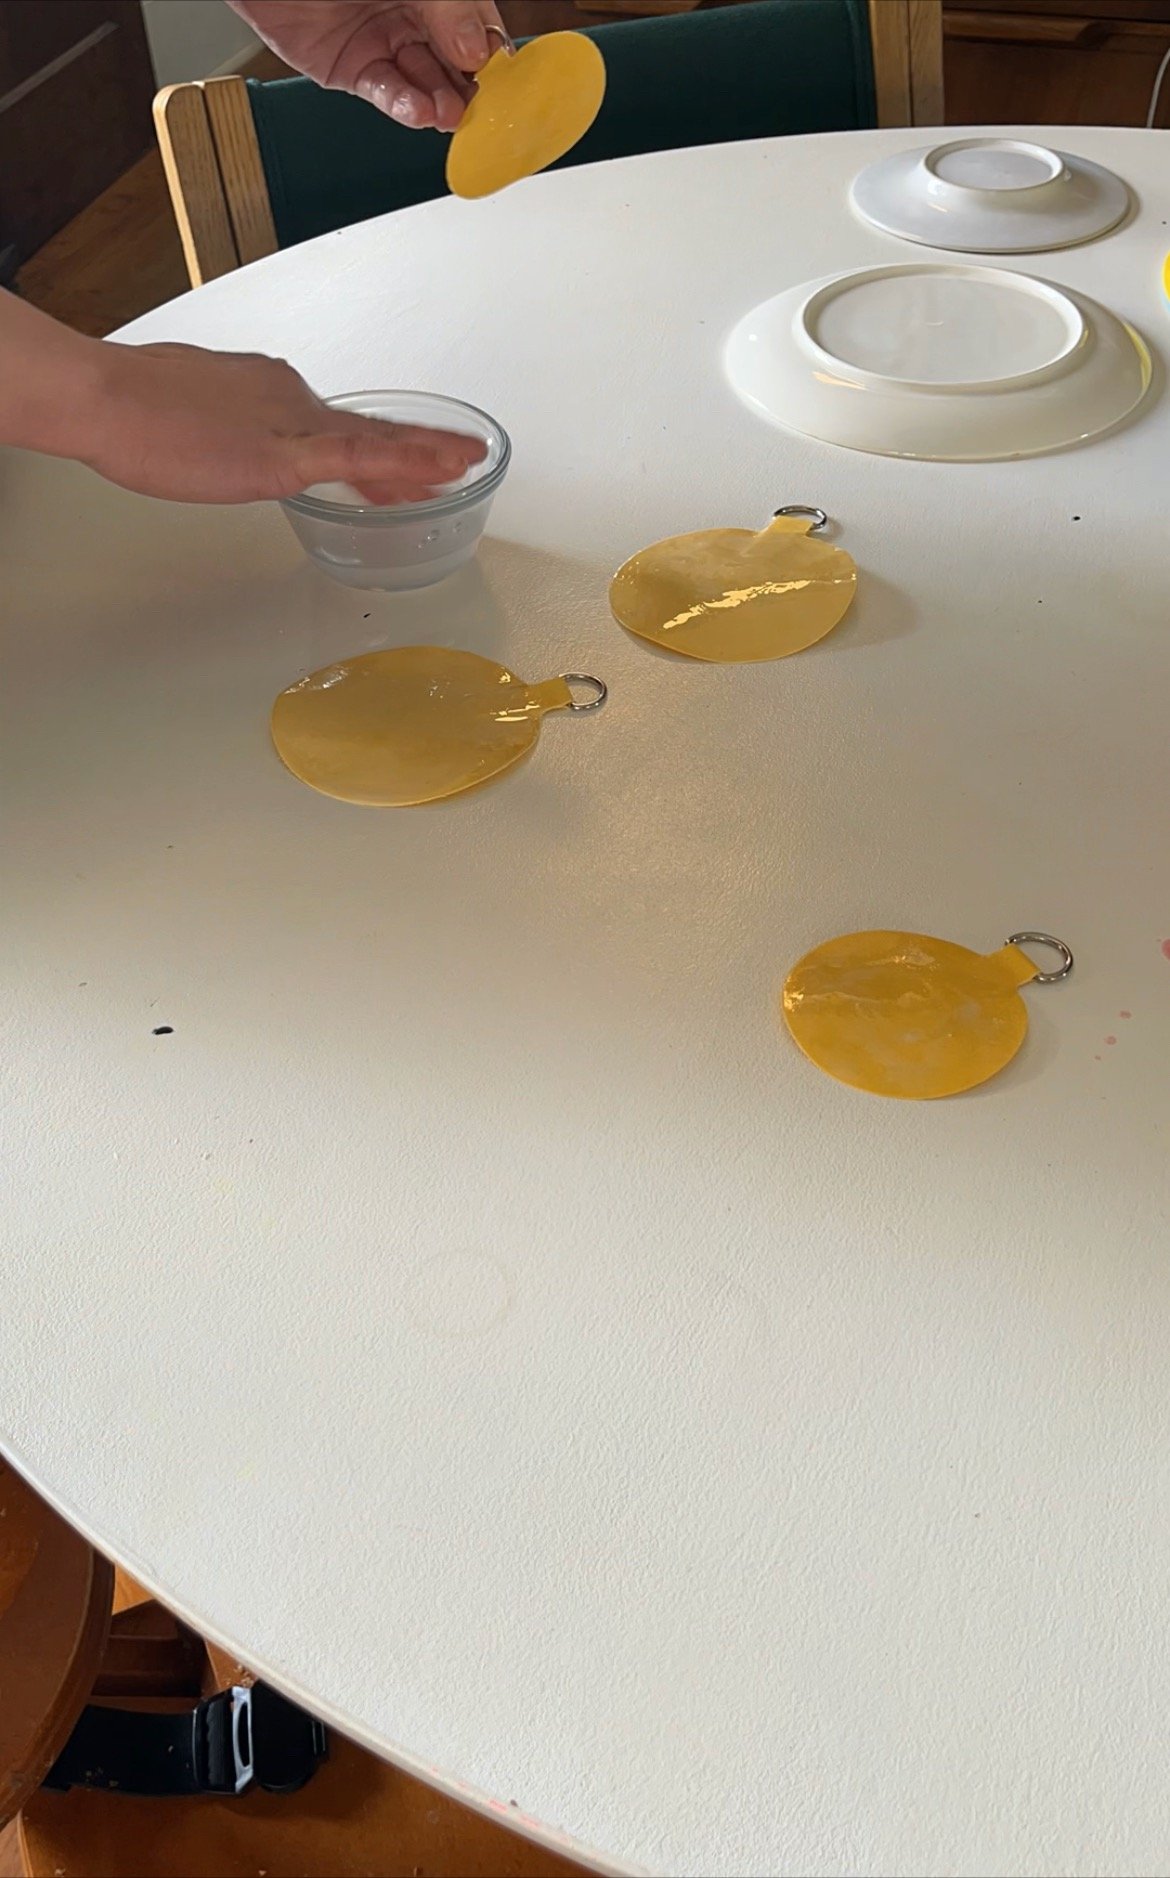
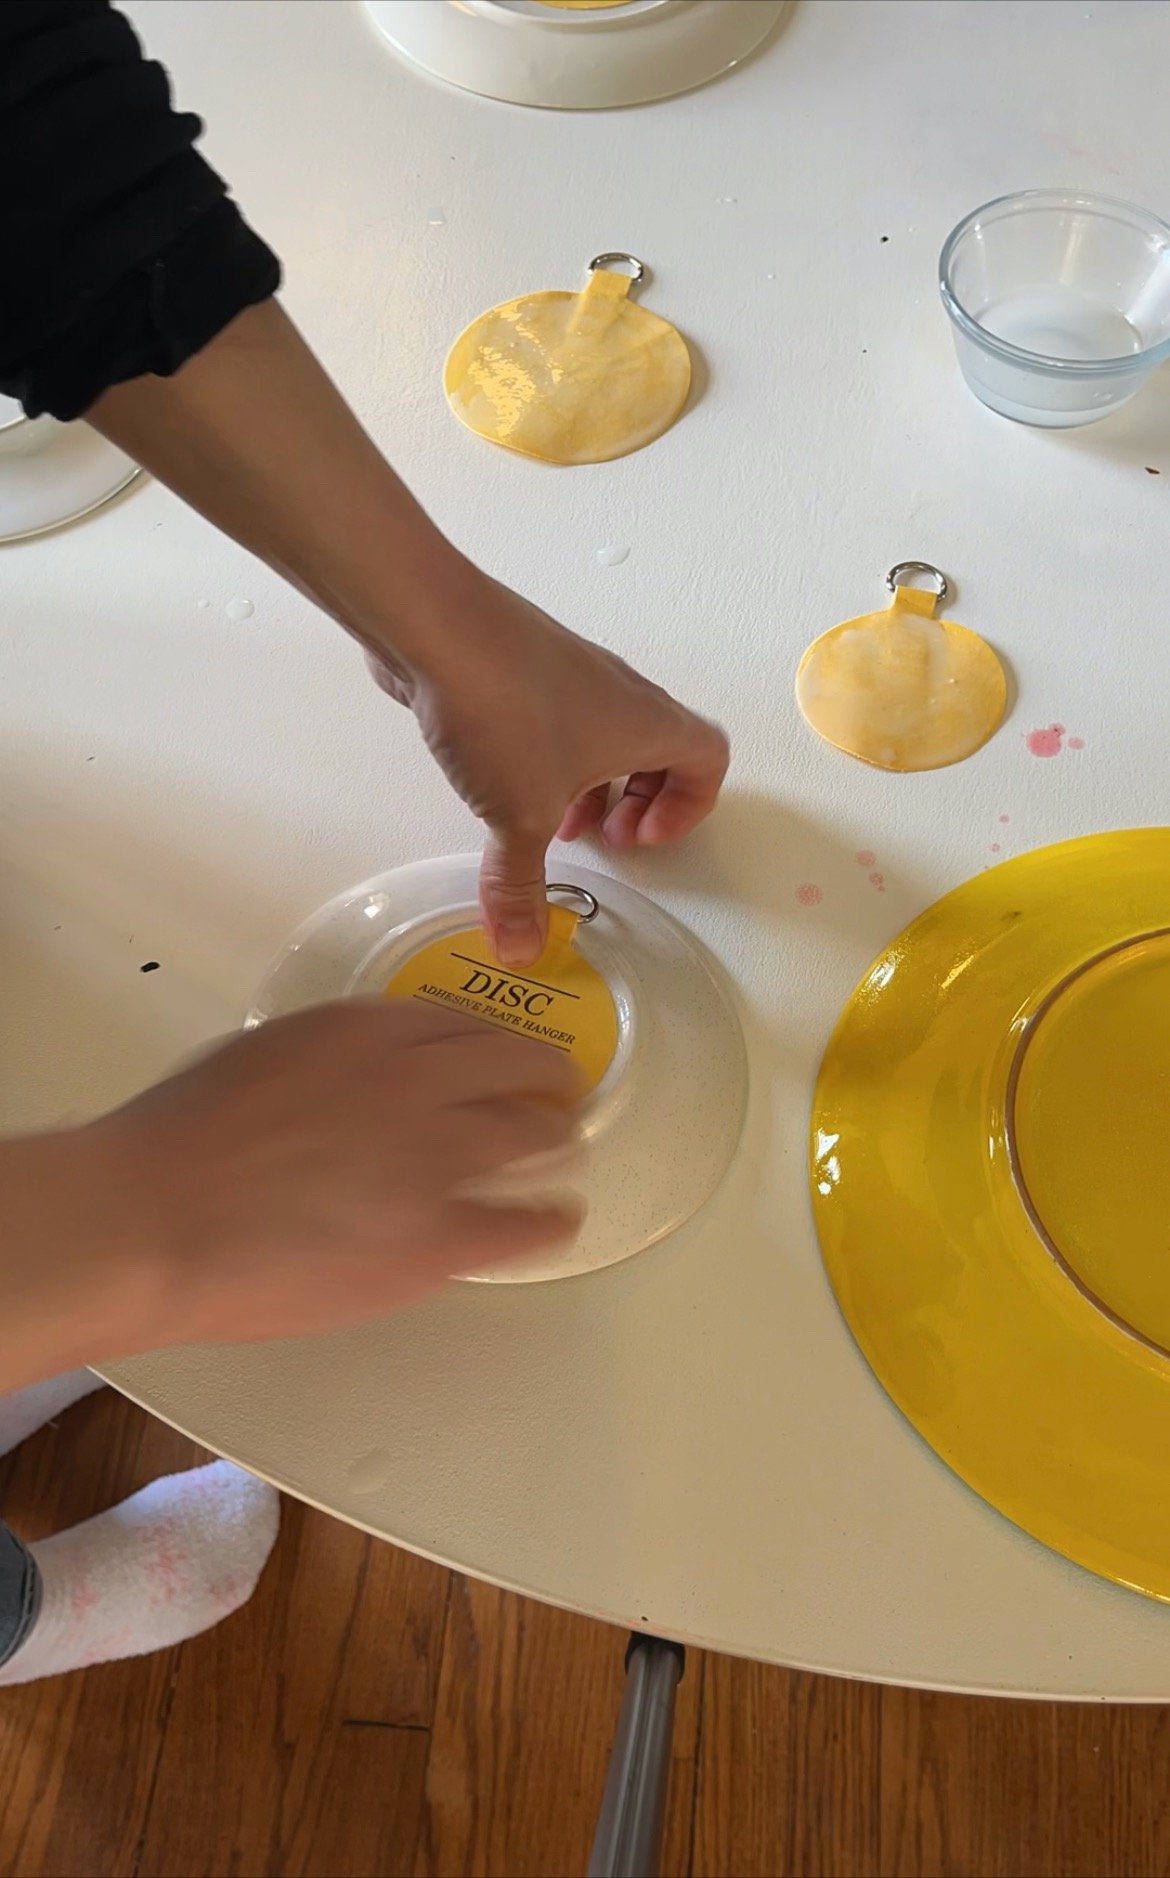
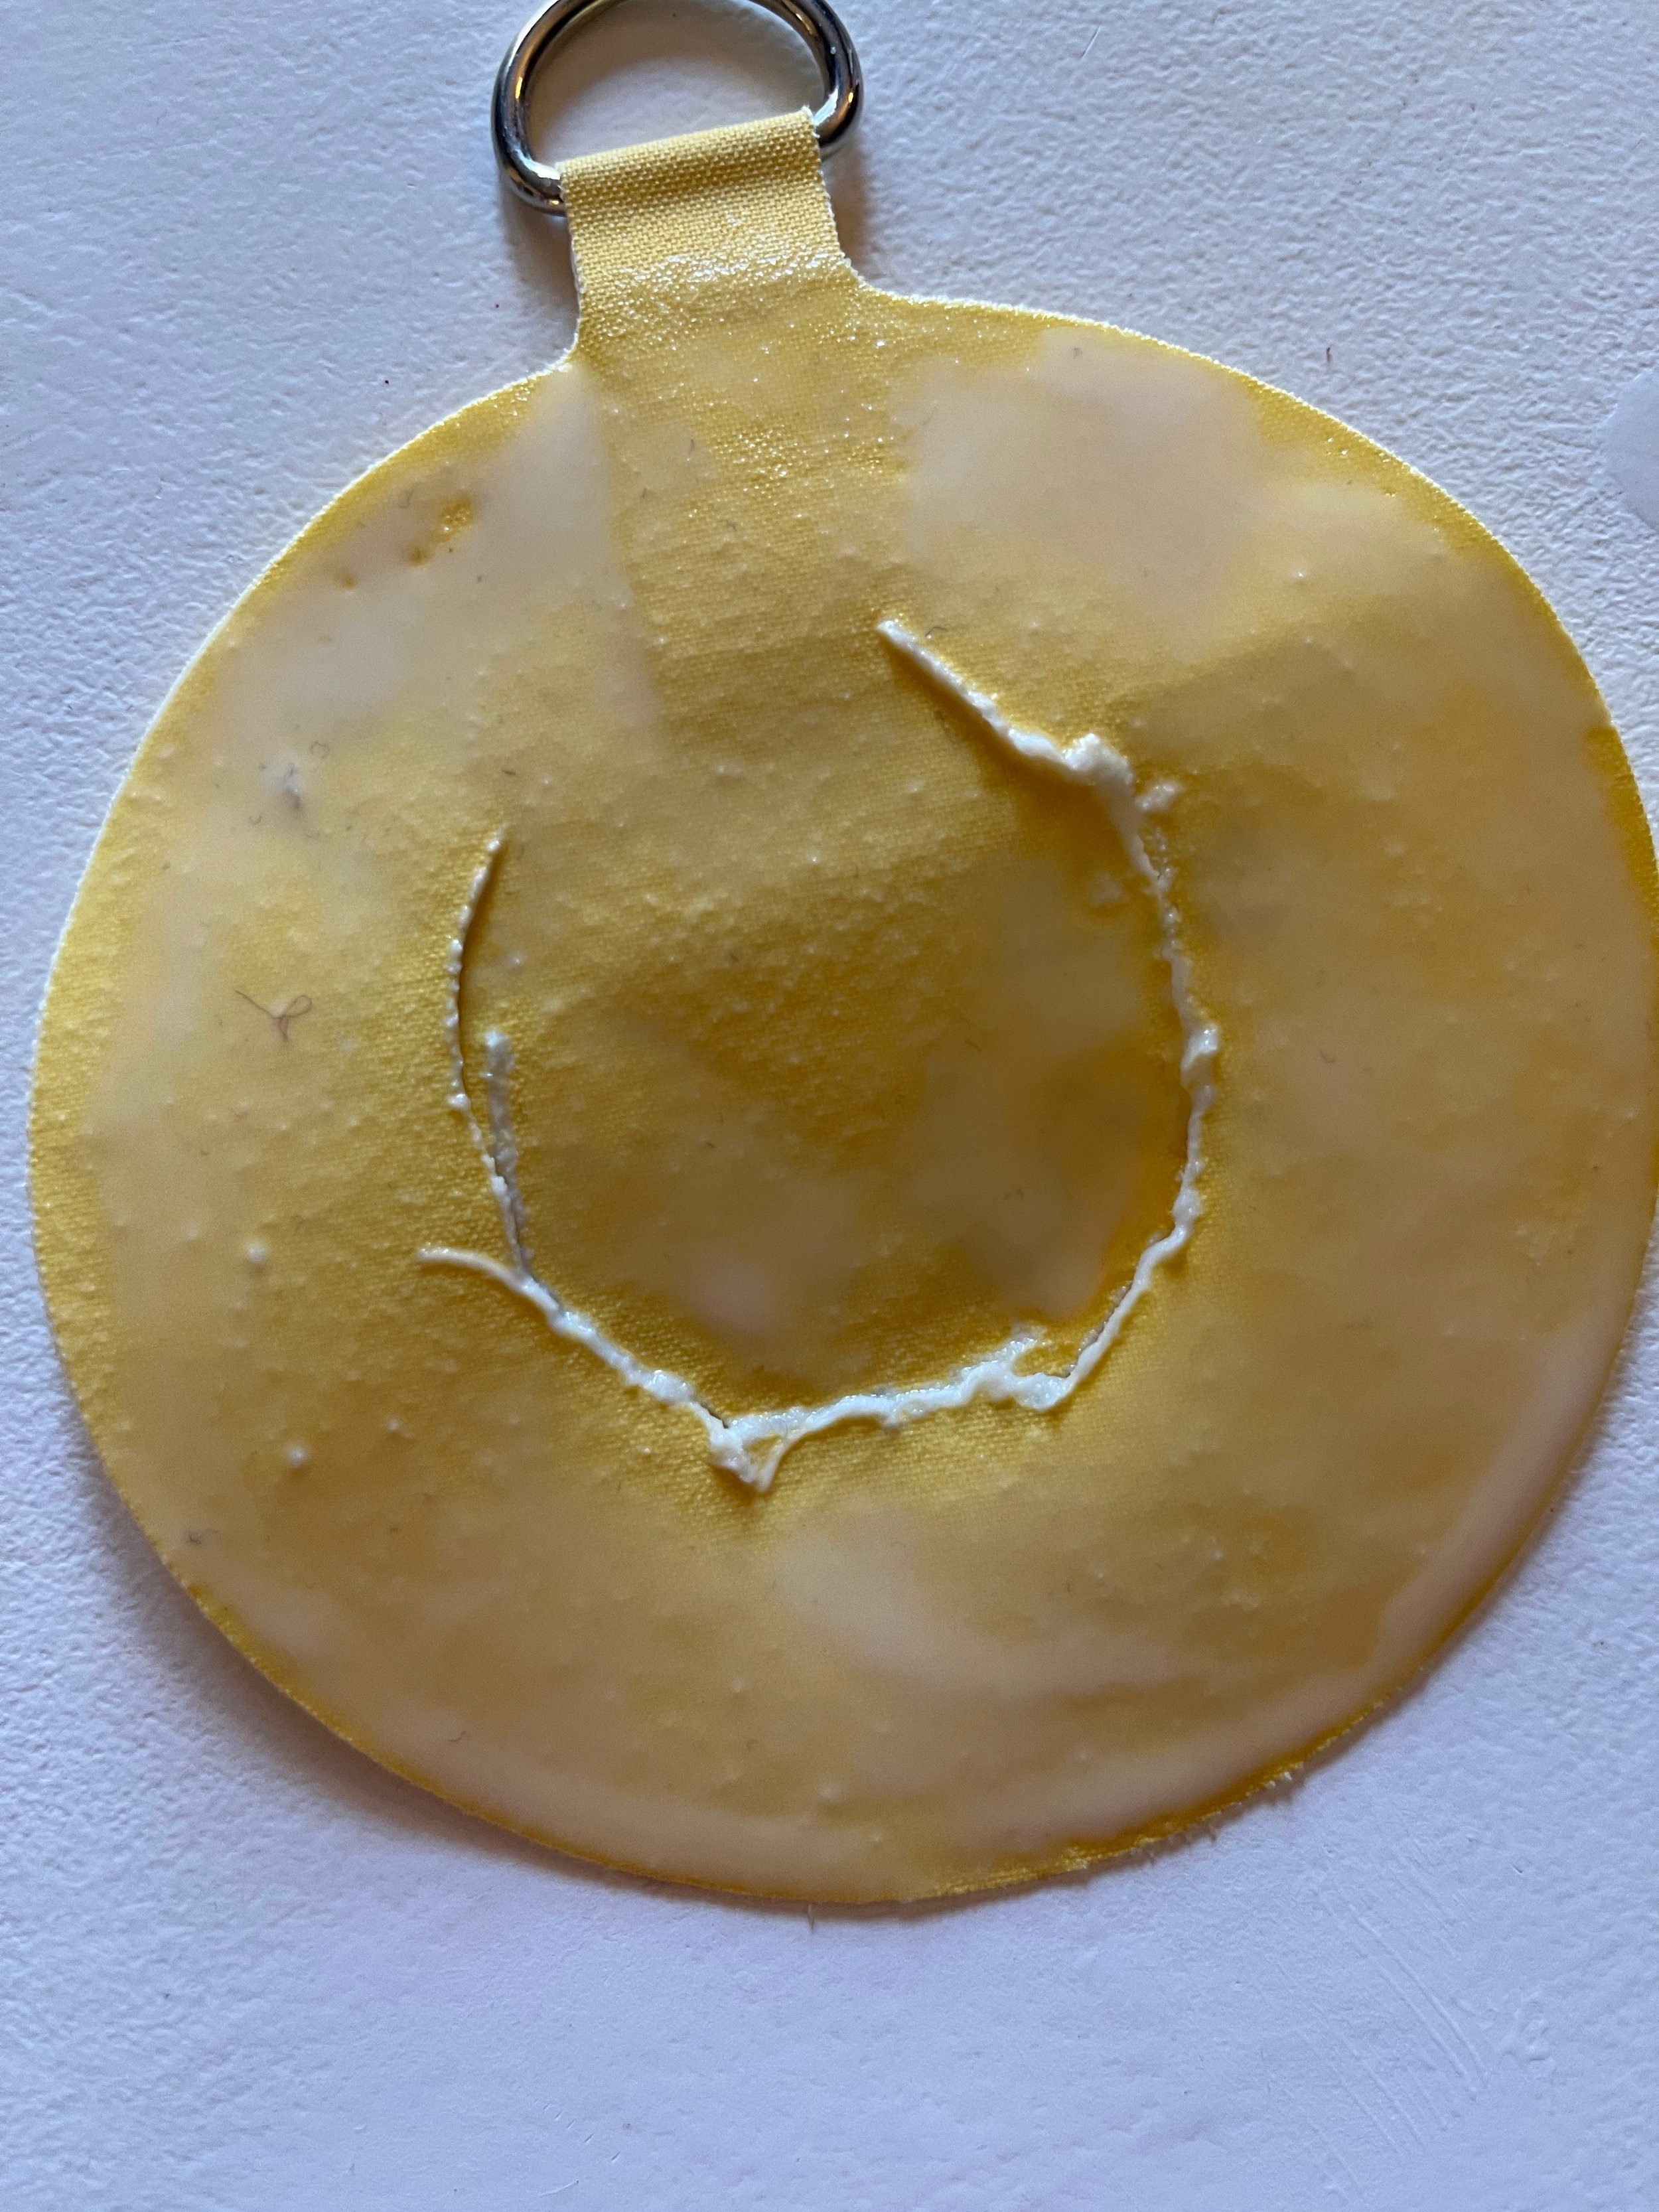
There are a few methods for hanging plates; the easiest and my preferred is to use DISC brand hangers. They are basically magic yellow stickers with a heavy duty amount of built-in adhesive which is activated by water. Once secured to the plate, you simply hang via the attached ring. Easy Peasy. I’ve used them a few times in the past and never had issue with slipping or plates breaking, but obviously, use your own discretion. Nothing I’ve hung in this display is heirloom quality.

To plan out my arrangement, I employed the highly quantifiable method of laying my plates out on the floor, over scrutinizing their placement, and obsessively photo documenting every tiny tweak made to the layout.

Once satisfied, I cut out paper templates, then taped them to the wall – which, naturally, once on the wall, meant more over-scrutinizing and tweaking.
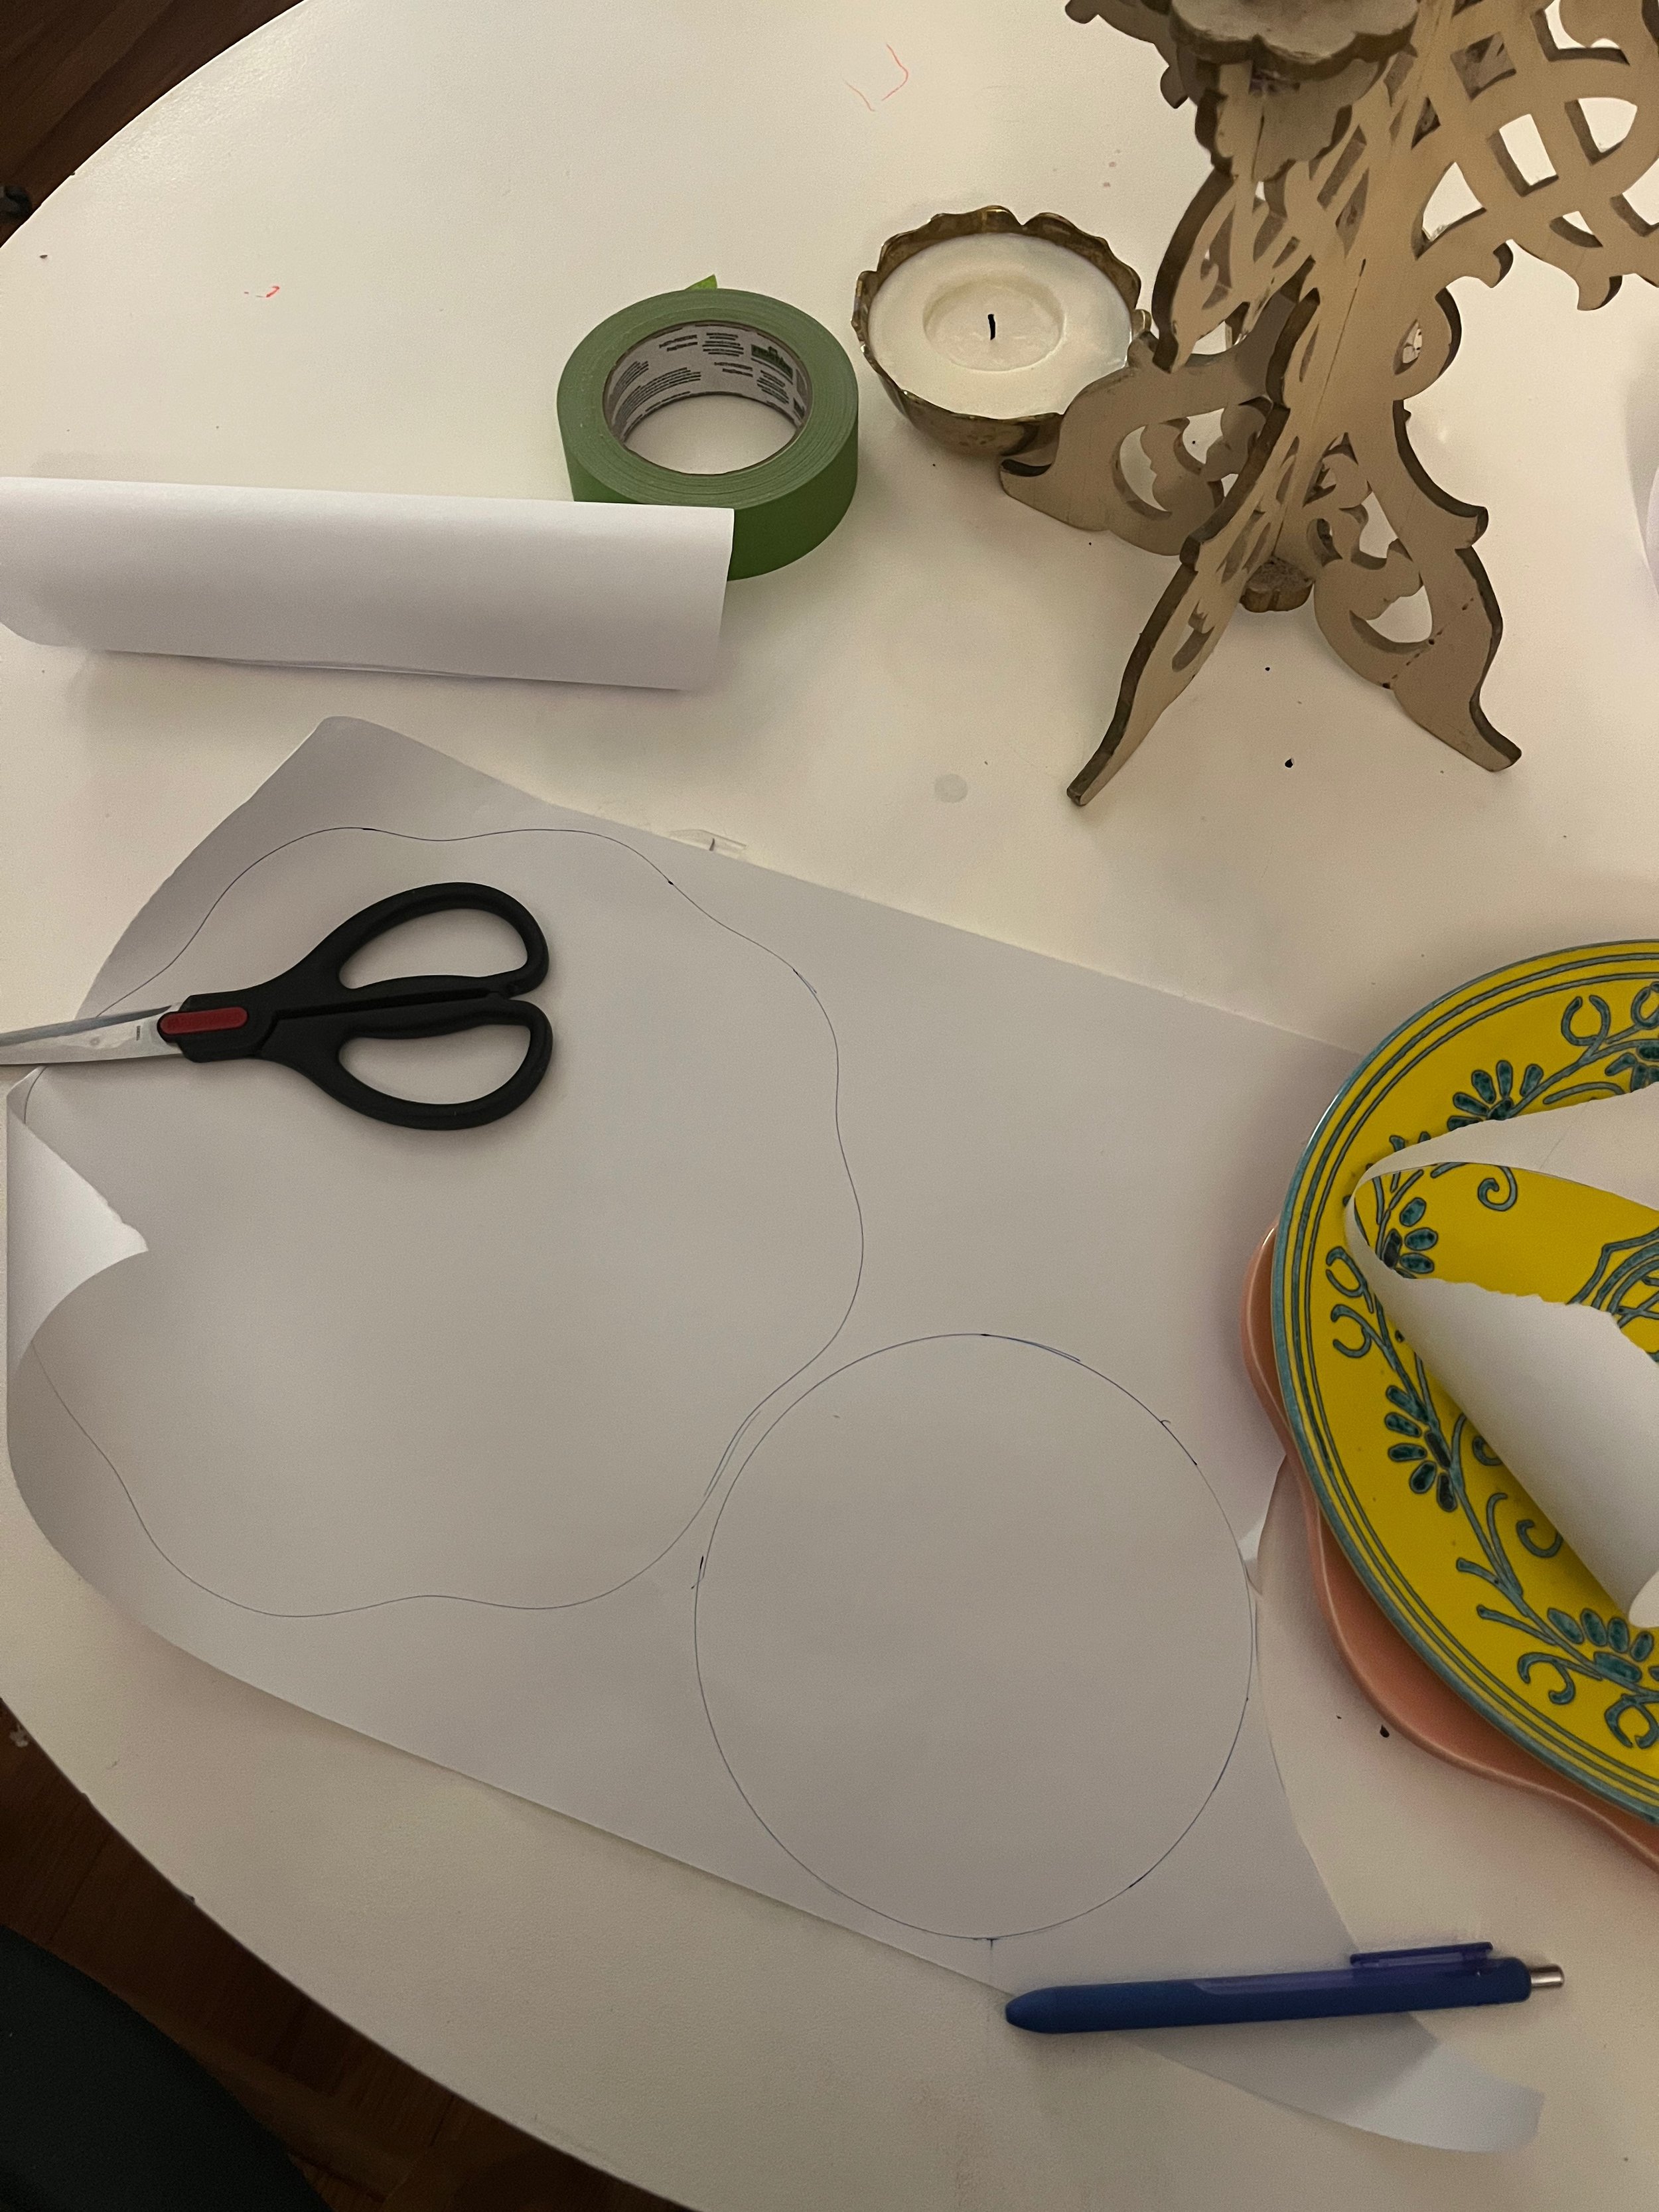
I left the templates up for a solid two weeks, side-eying them every chance possible to make sure I was certain. Then I just followed the instructions.
Step 1: Wash and dry plates thoroughly
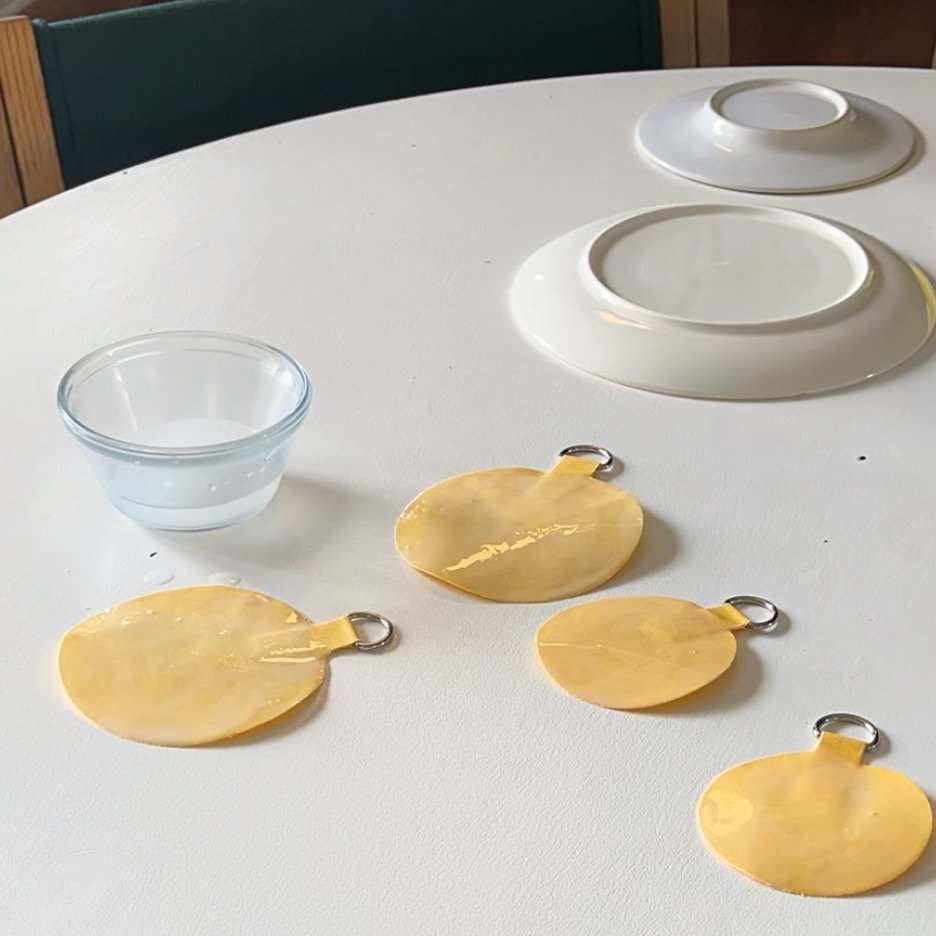
Step 2: Activate adhesive with water, let sit and get tacky for 3-5 minutes
Step 3: Repeat step 2
Step 4: Stick to plate
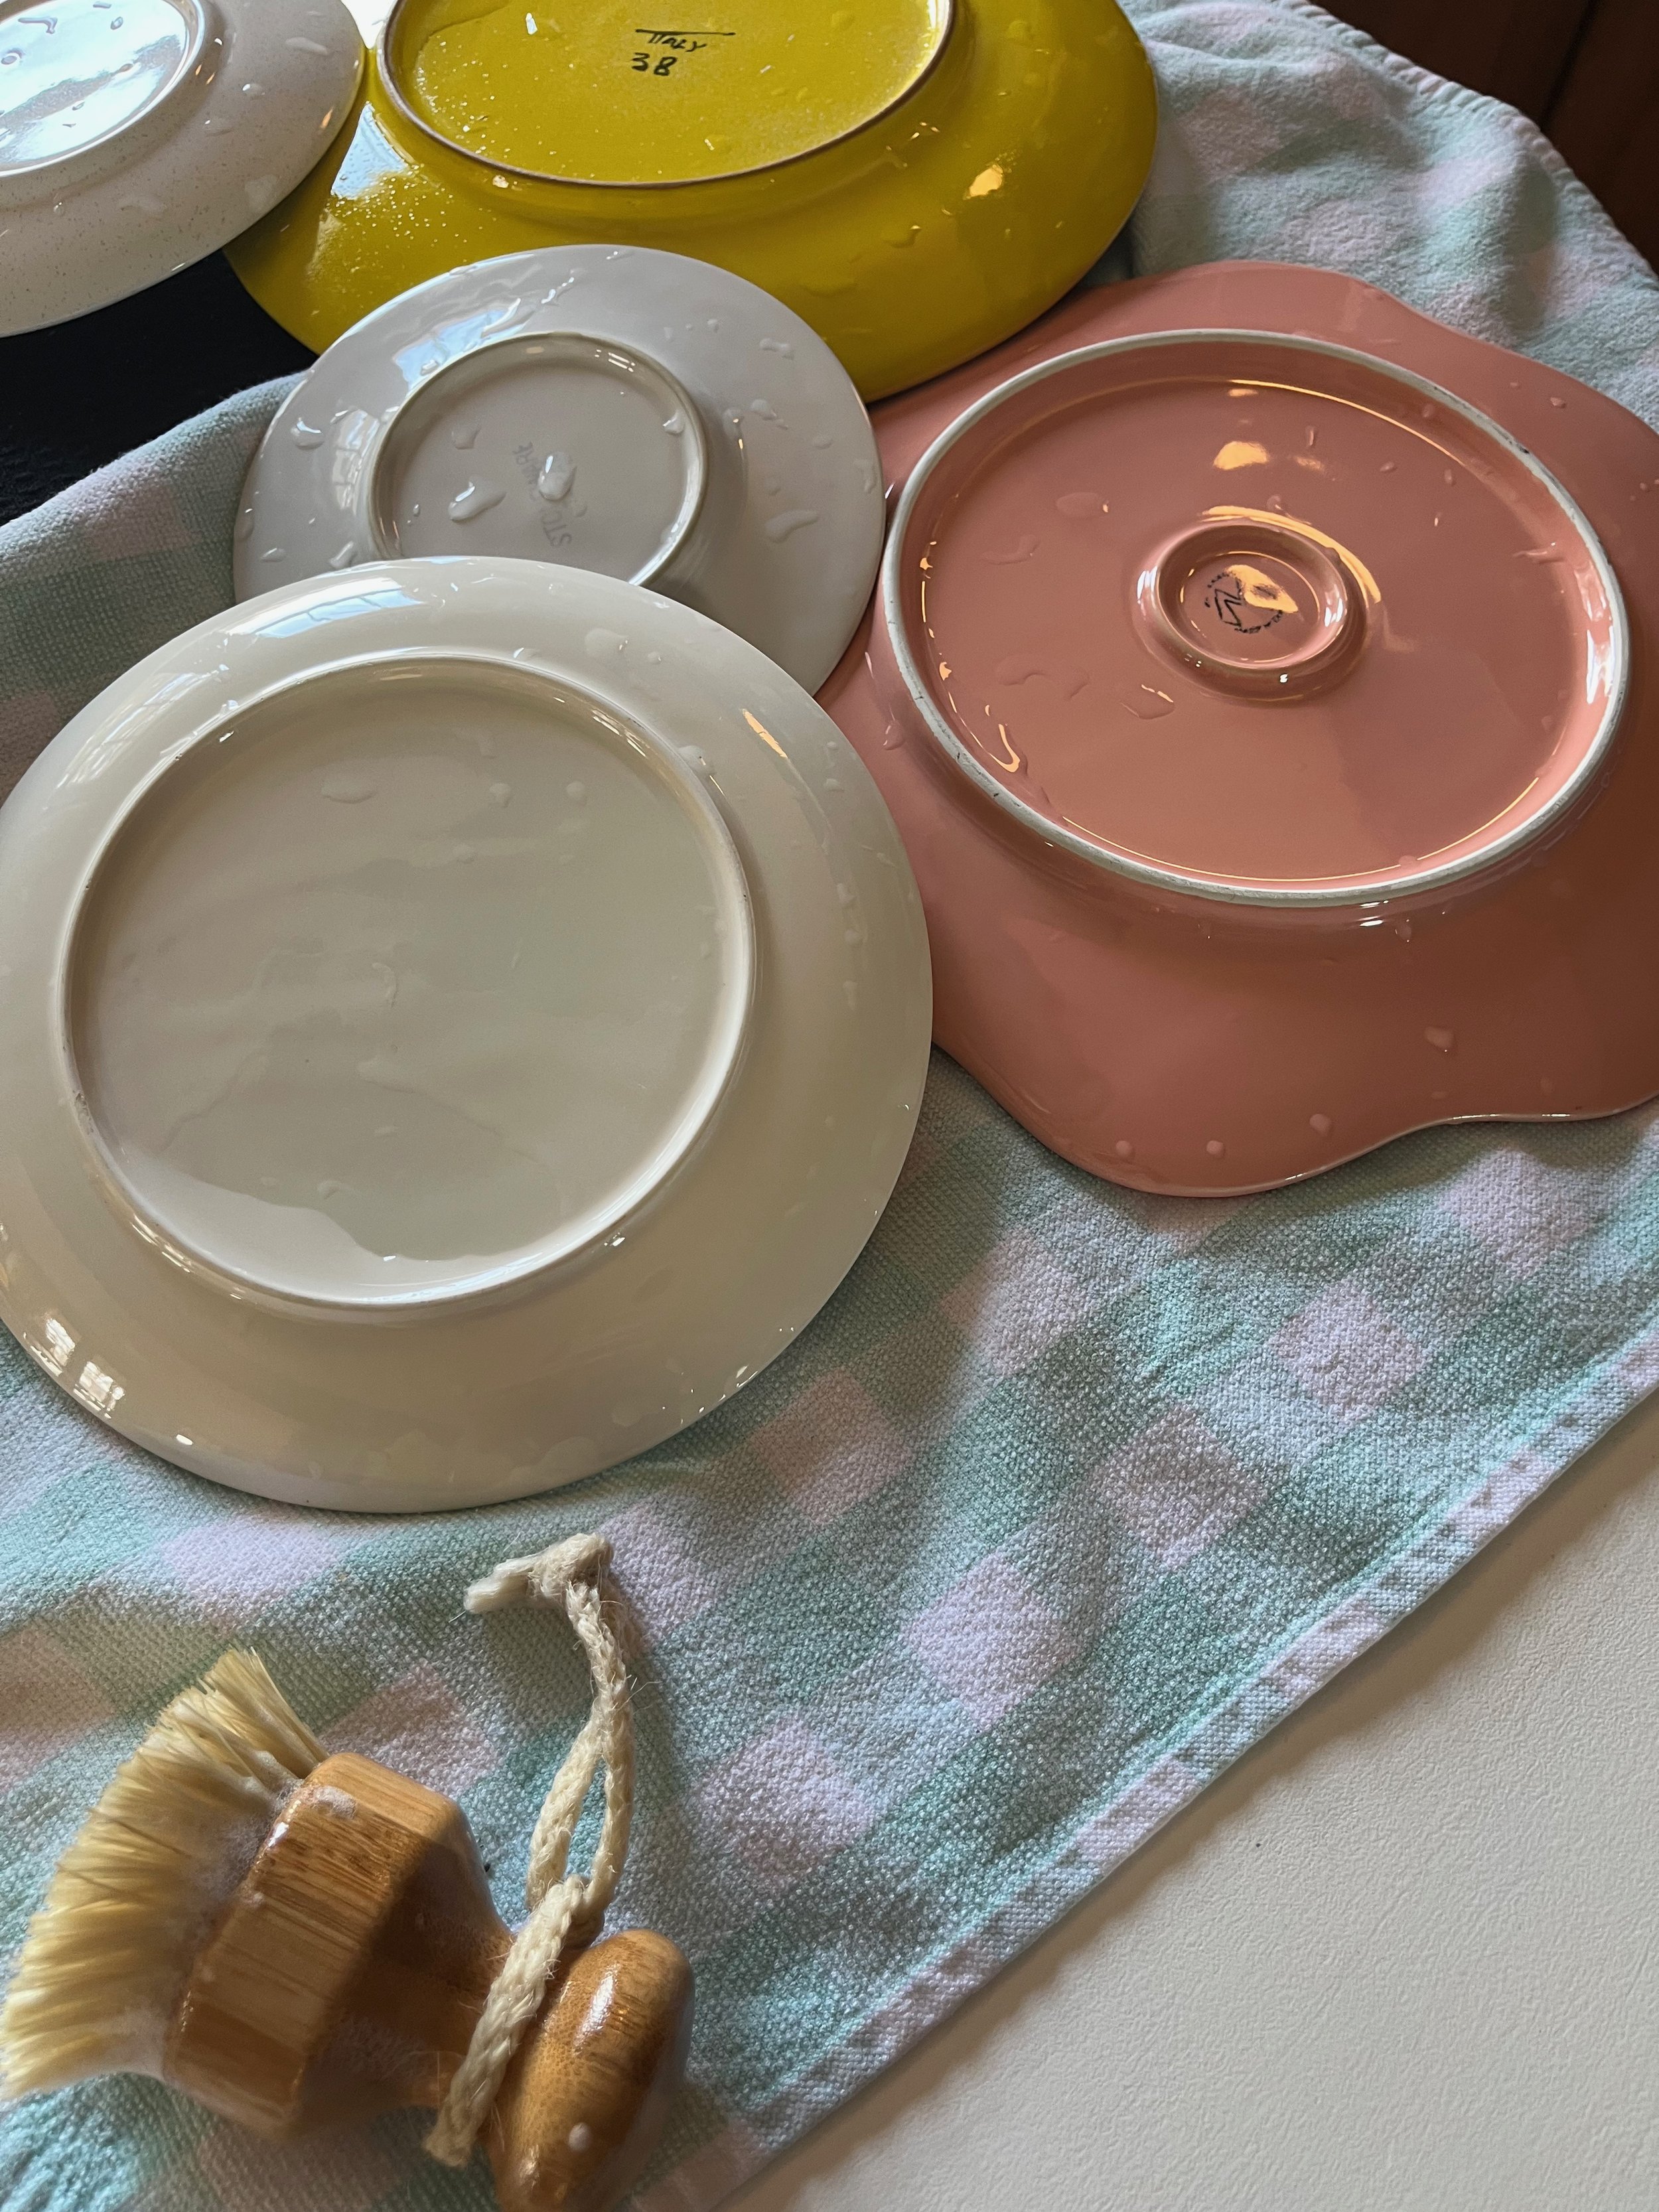
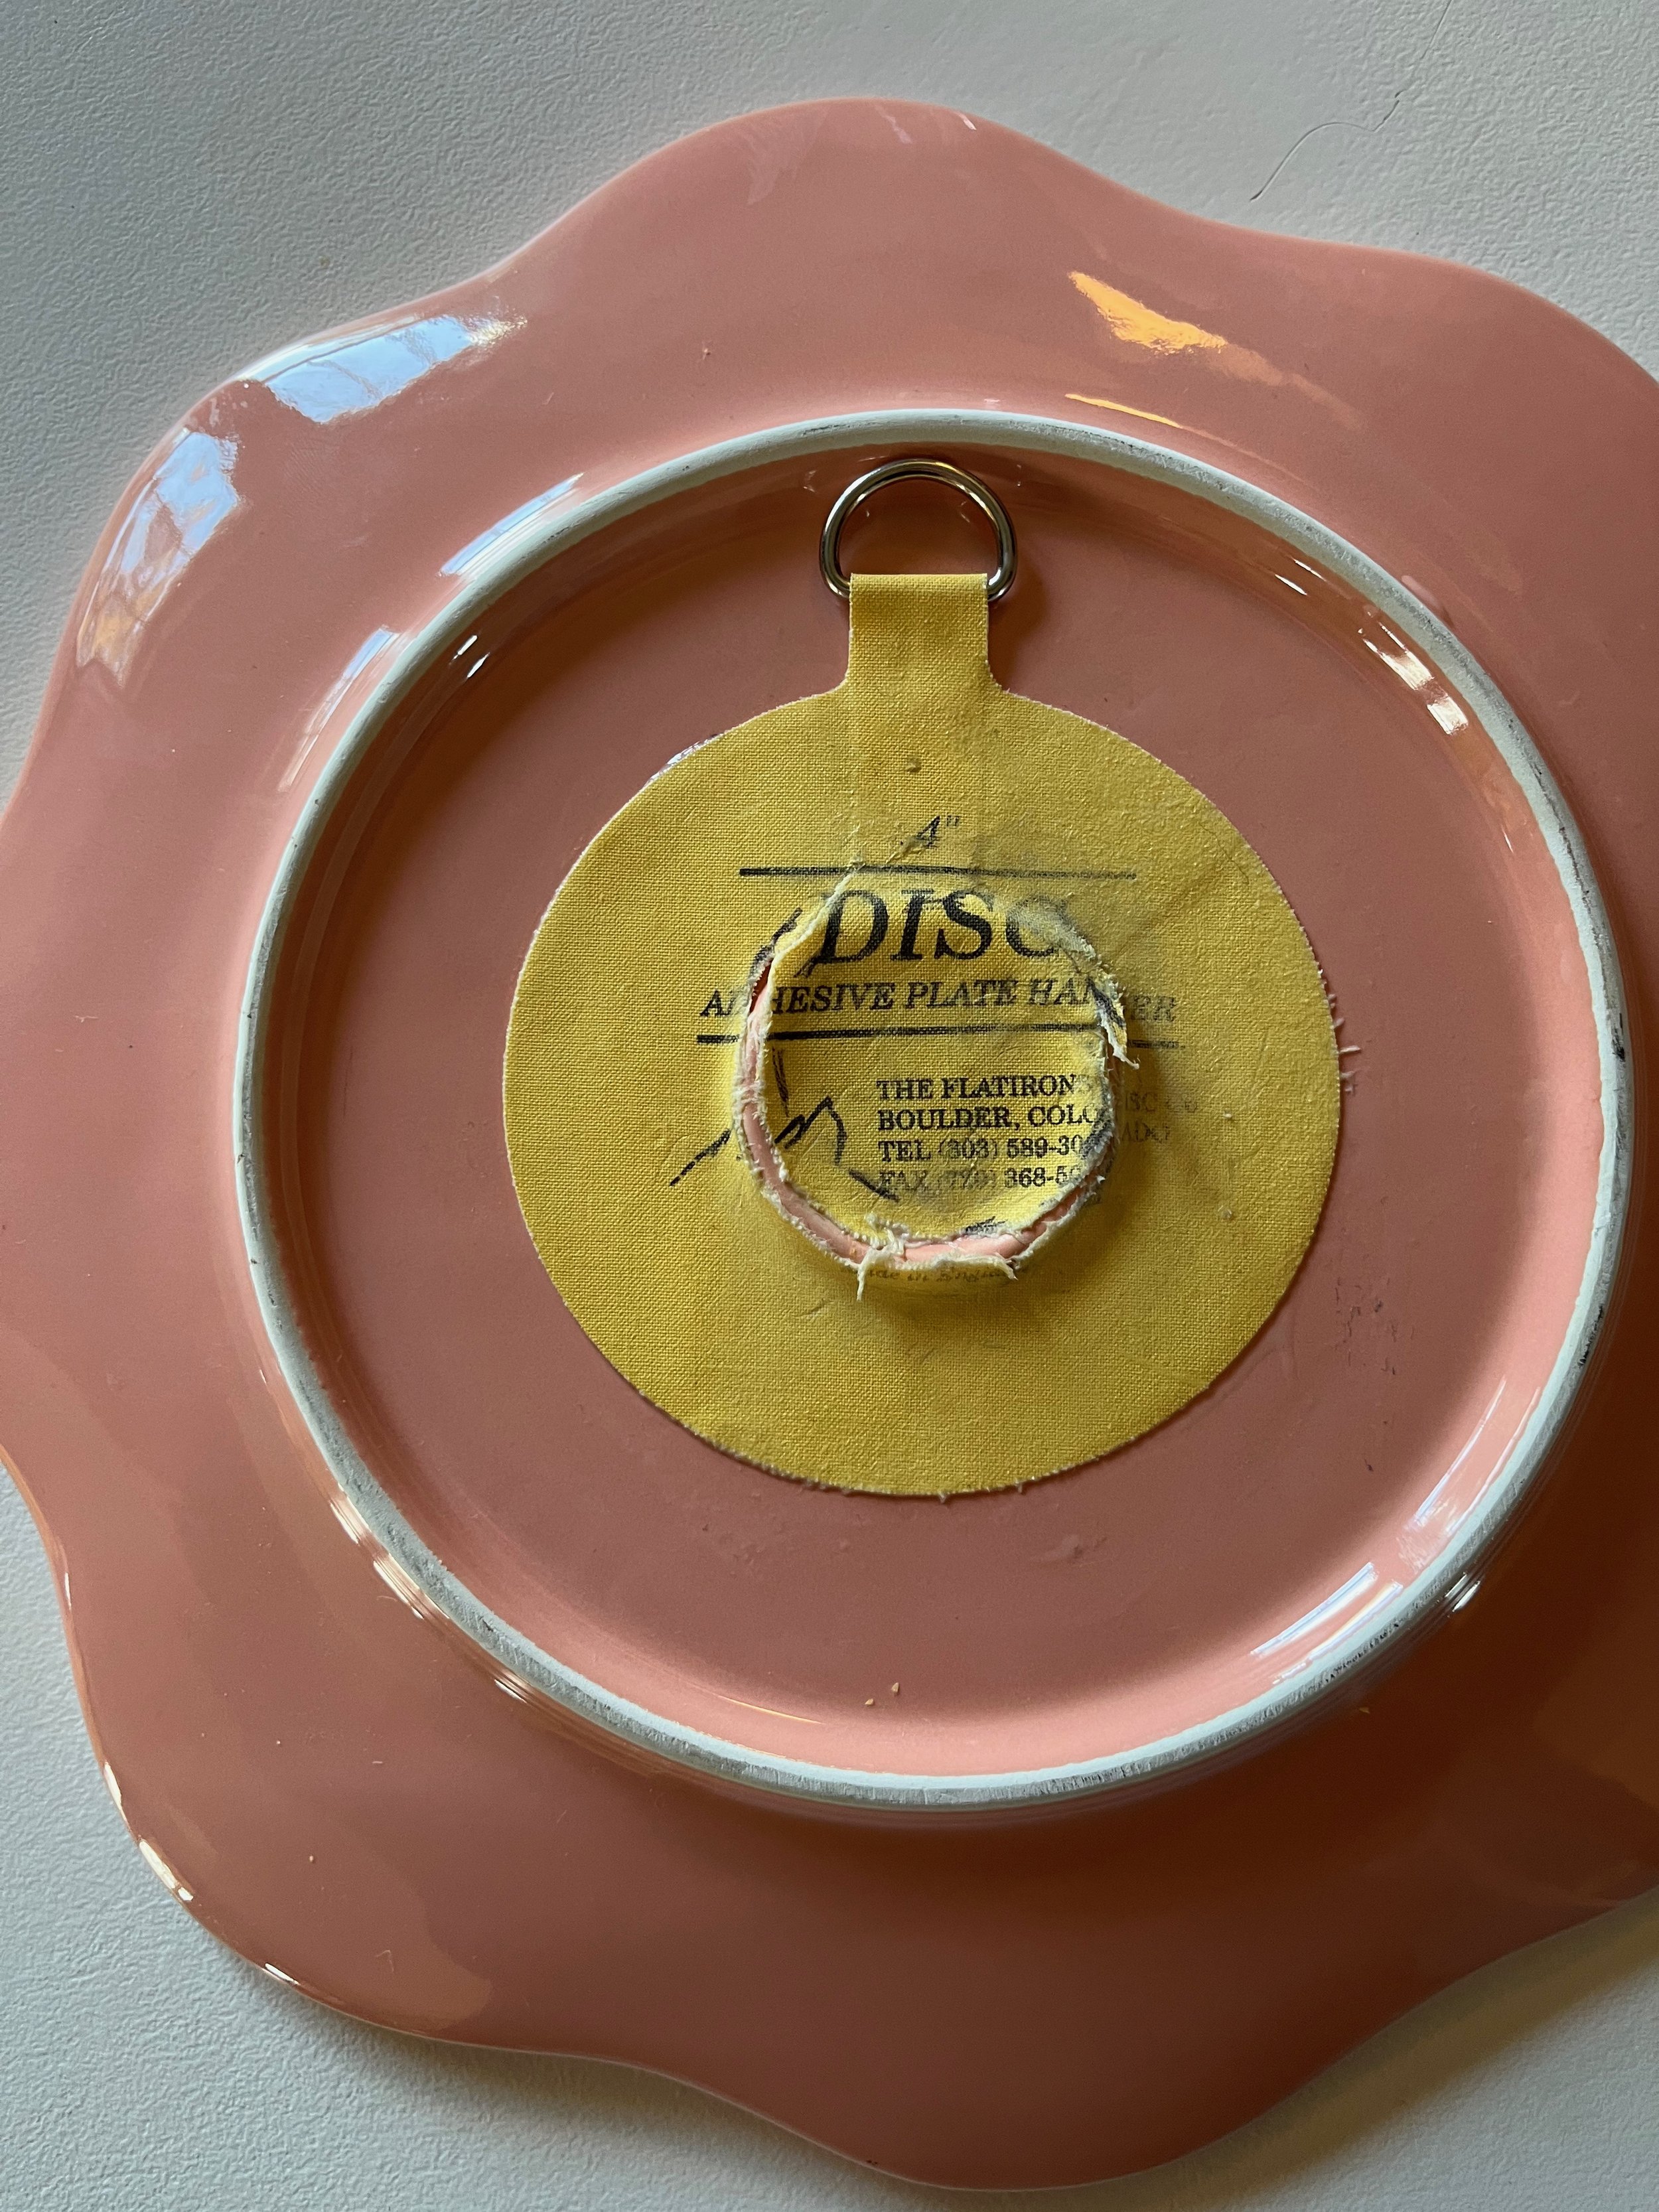
The only plate that required a little troubleshooting was the pink scalloped one.
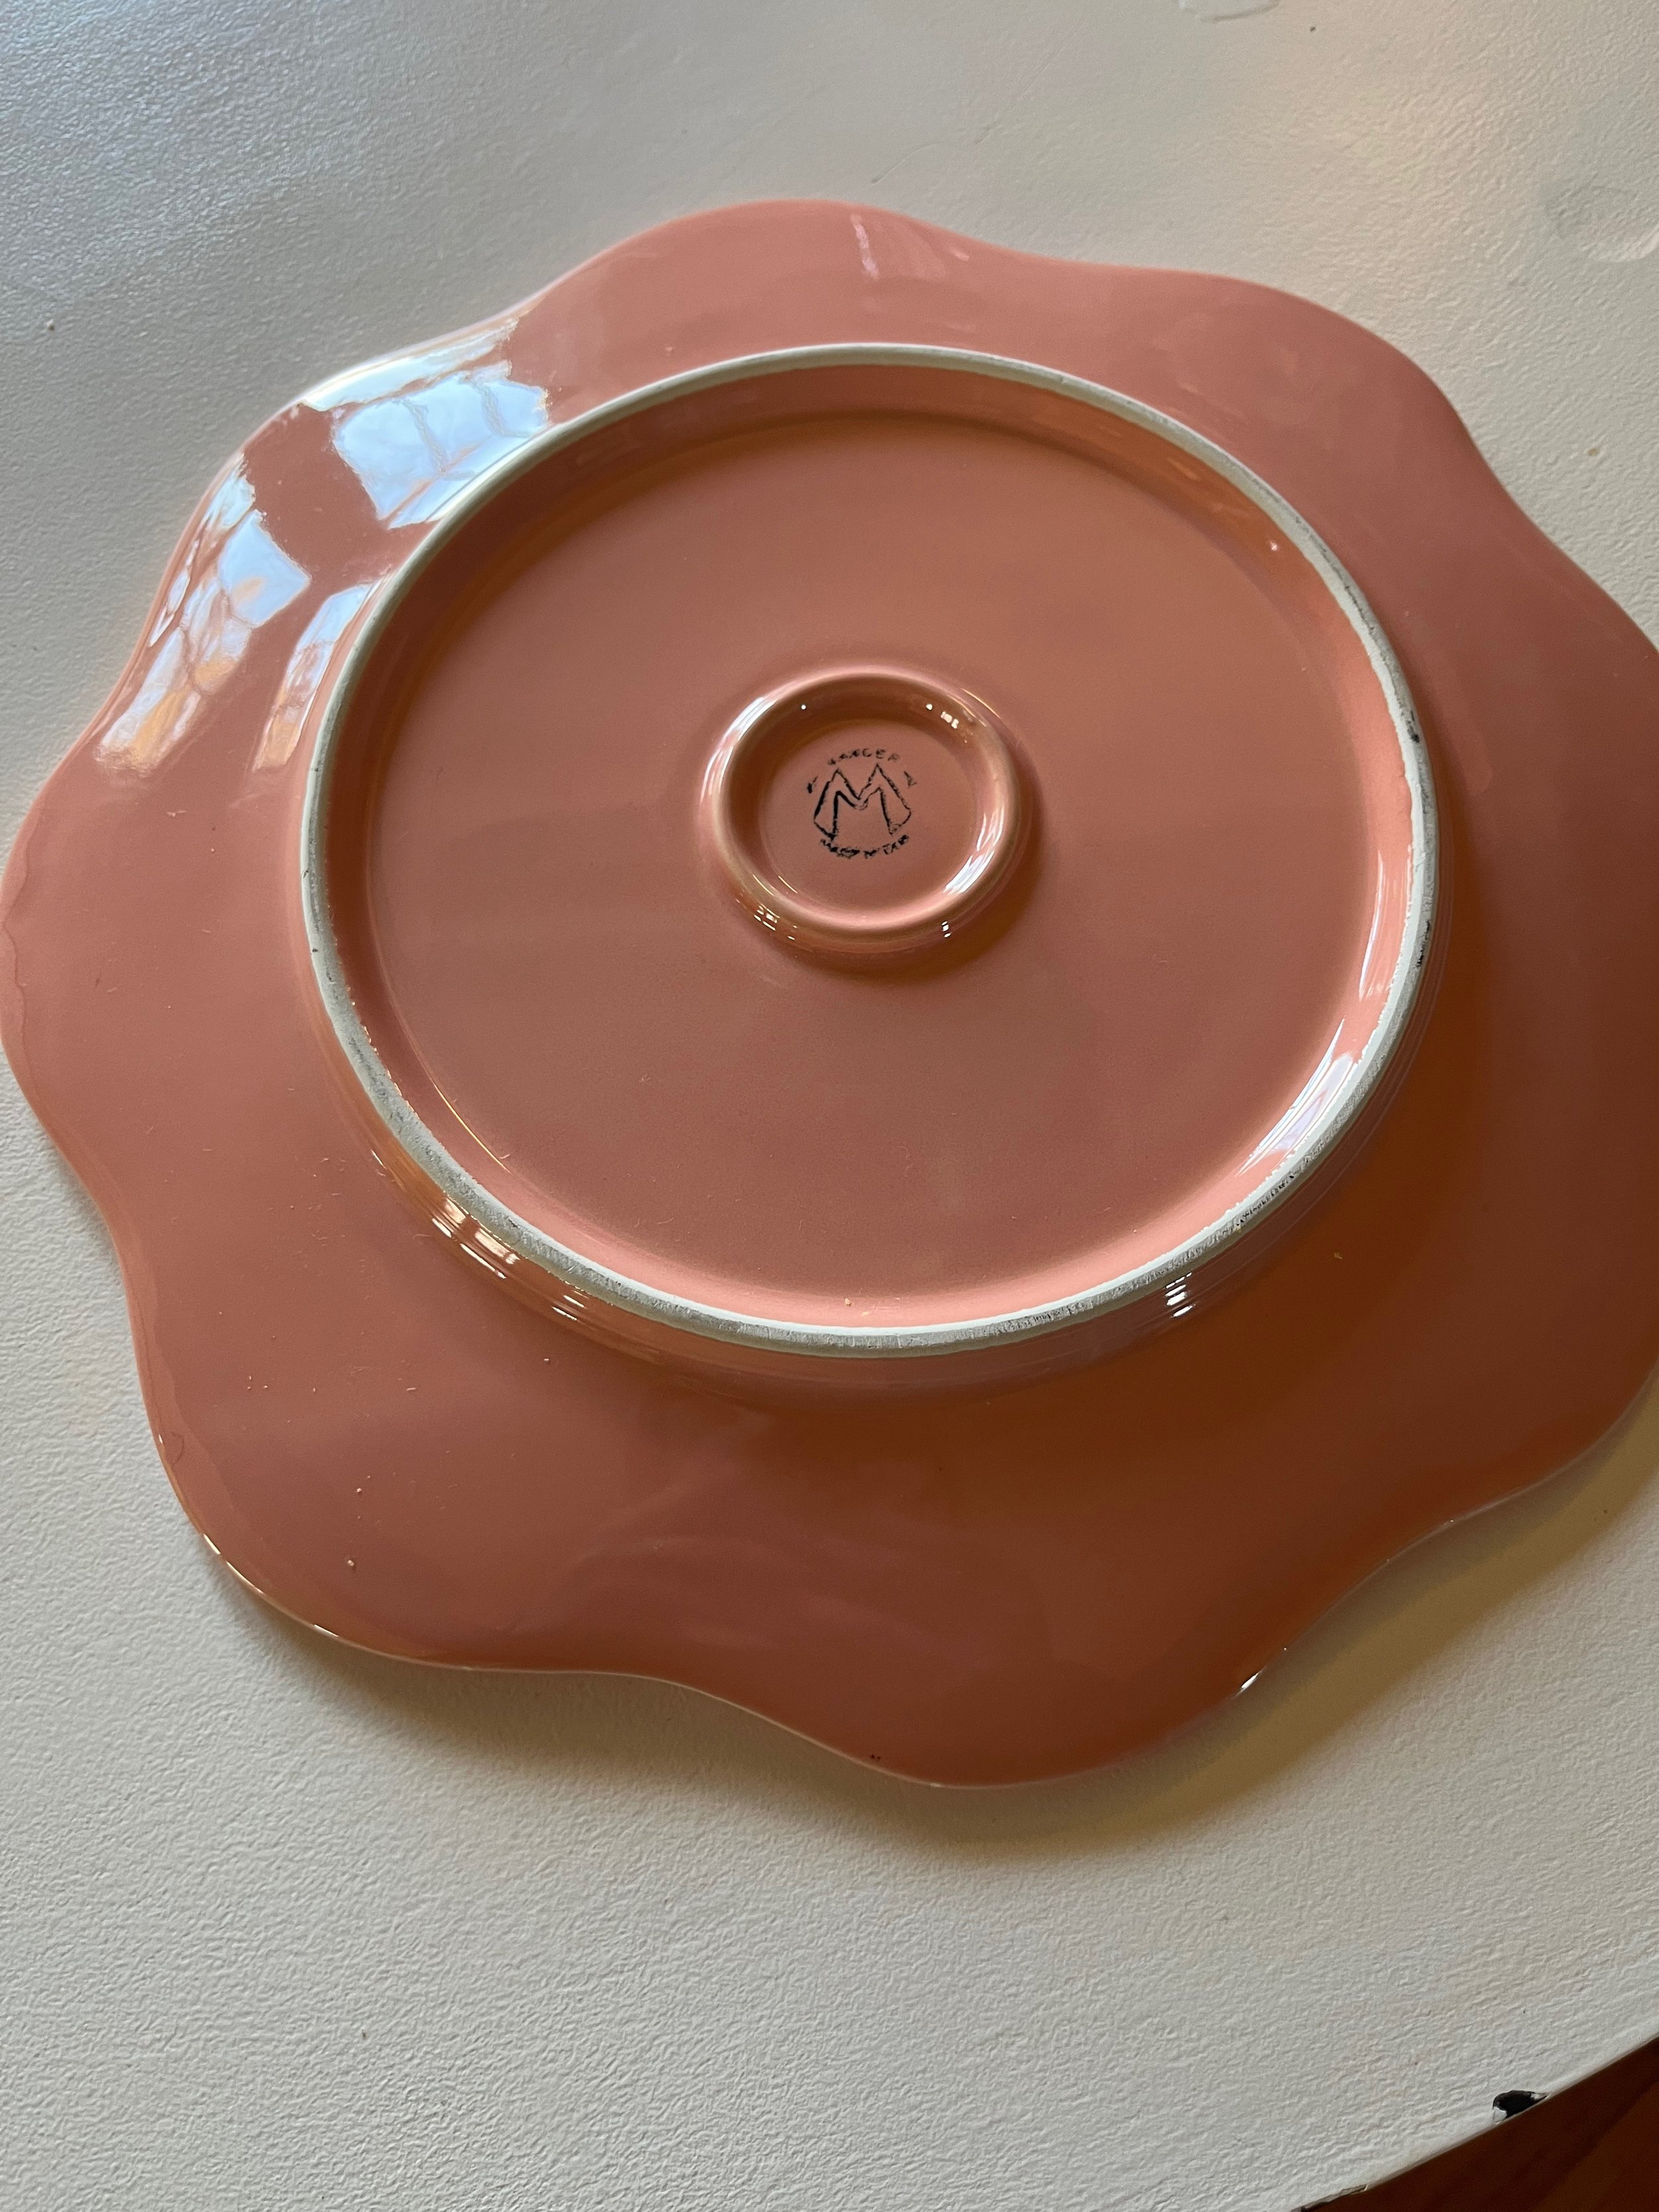
Because it had a raised lip on the center back I was worried the disc wouldn’t adhere completely. I had to get a little creative and came up with this janky workaround.
It’s been holding strong for the last month. I’m cautiously hopeful it’ll remain there…
Per the instructions, I left the plates to sit overnight allowing the chance for everything to adhere properly, then installed them the following day. This was a breeze since I already had my templates in place. Yay for the rare occurrence when a project is quick and straightforward!
And here it is all cleaned up and pretty!
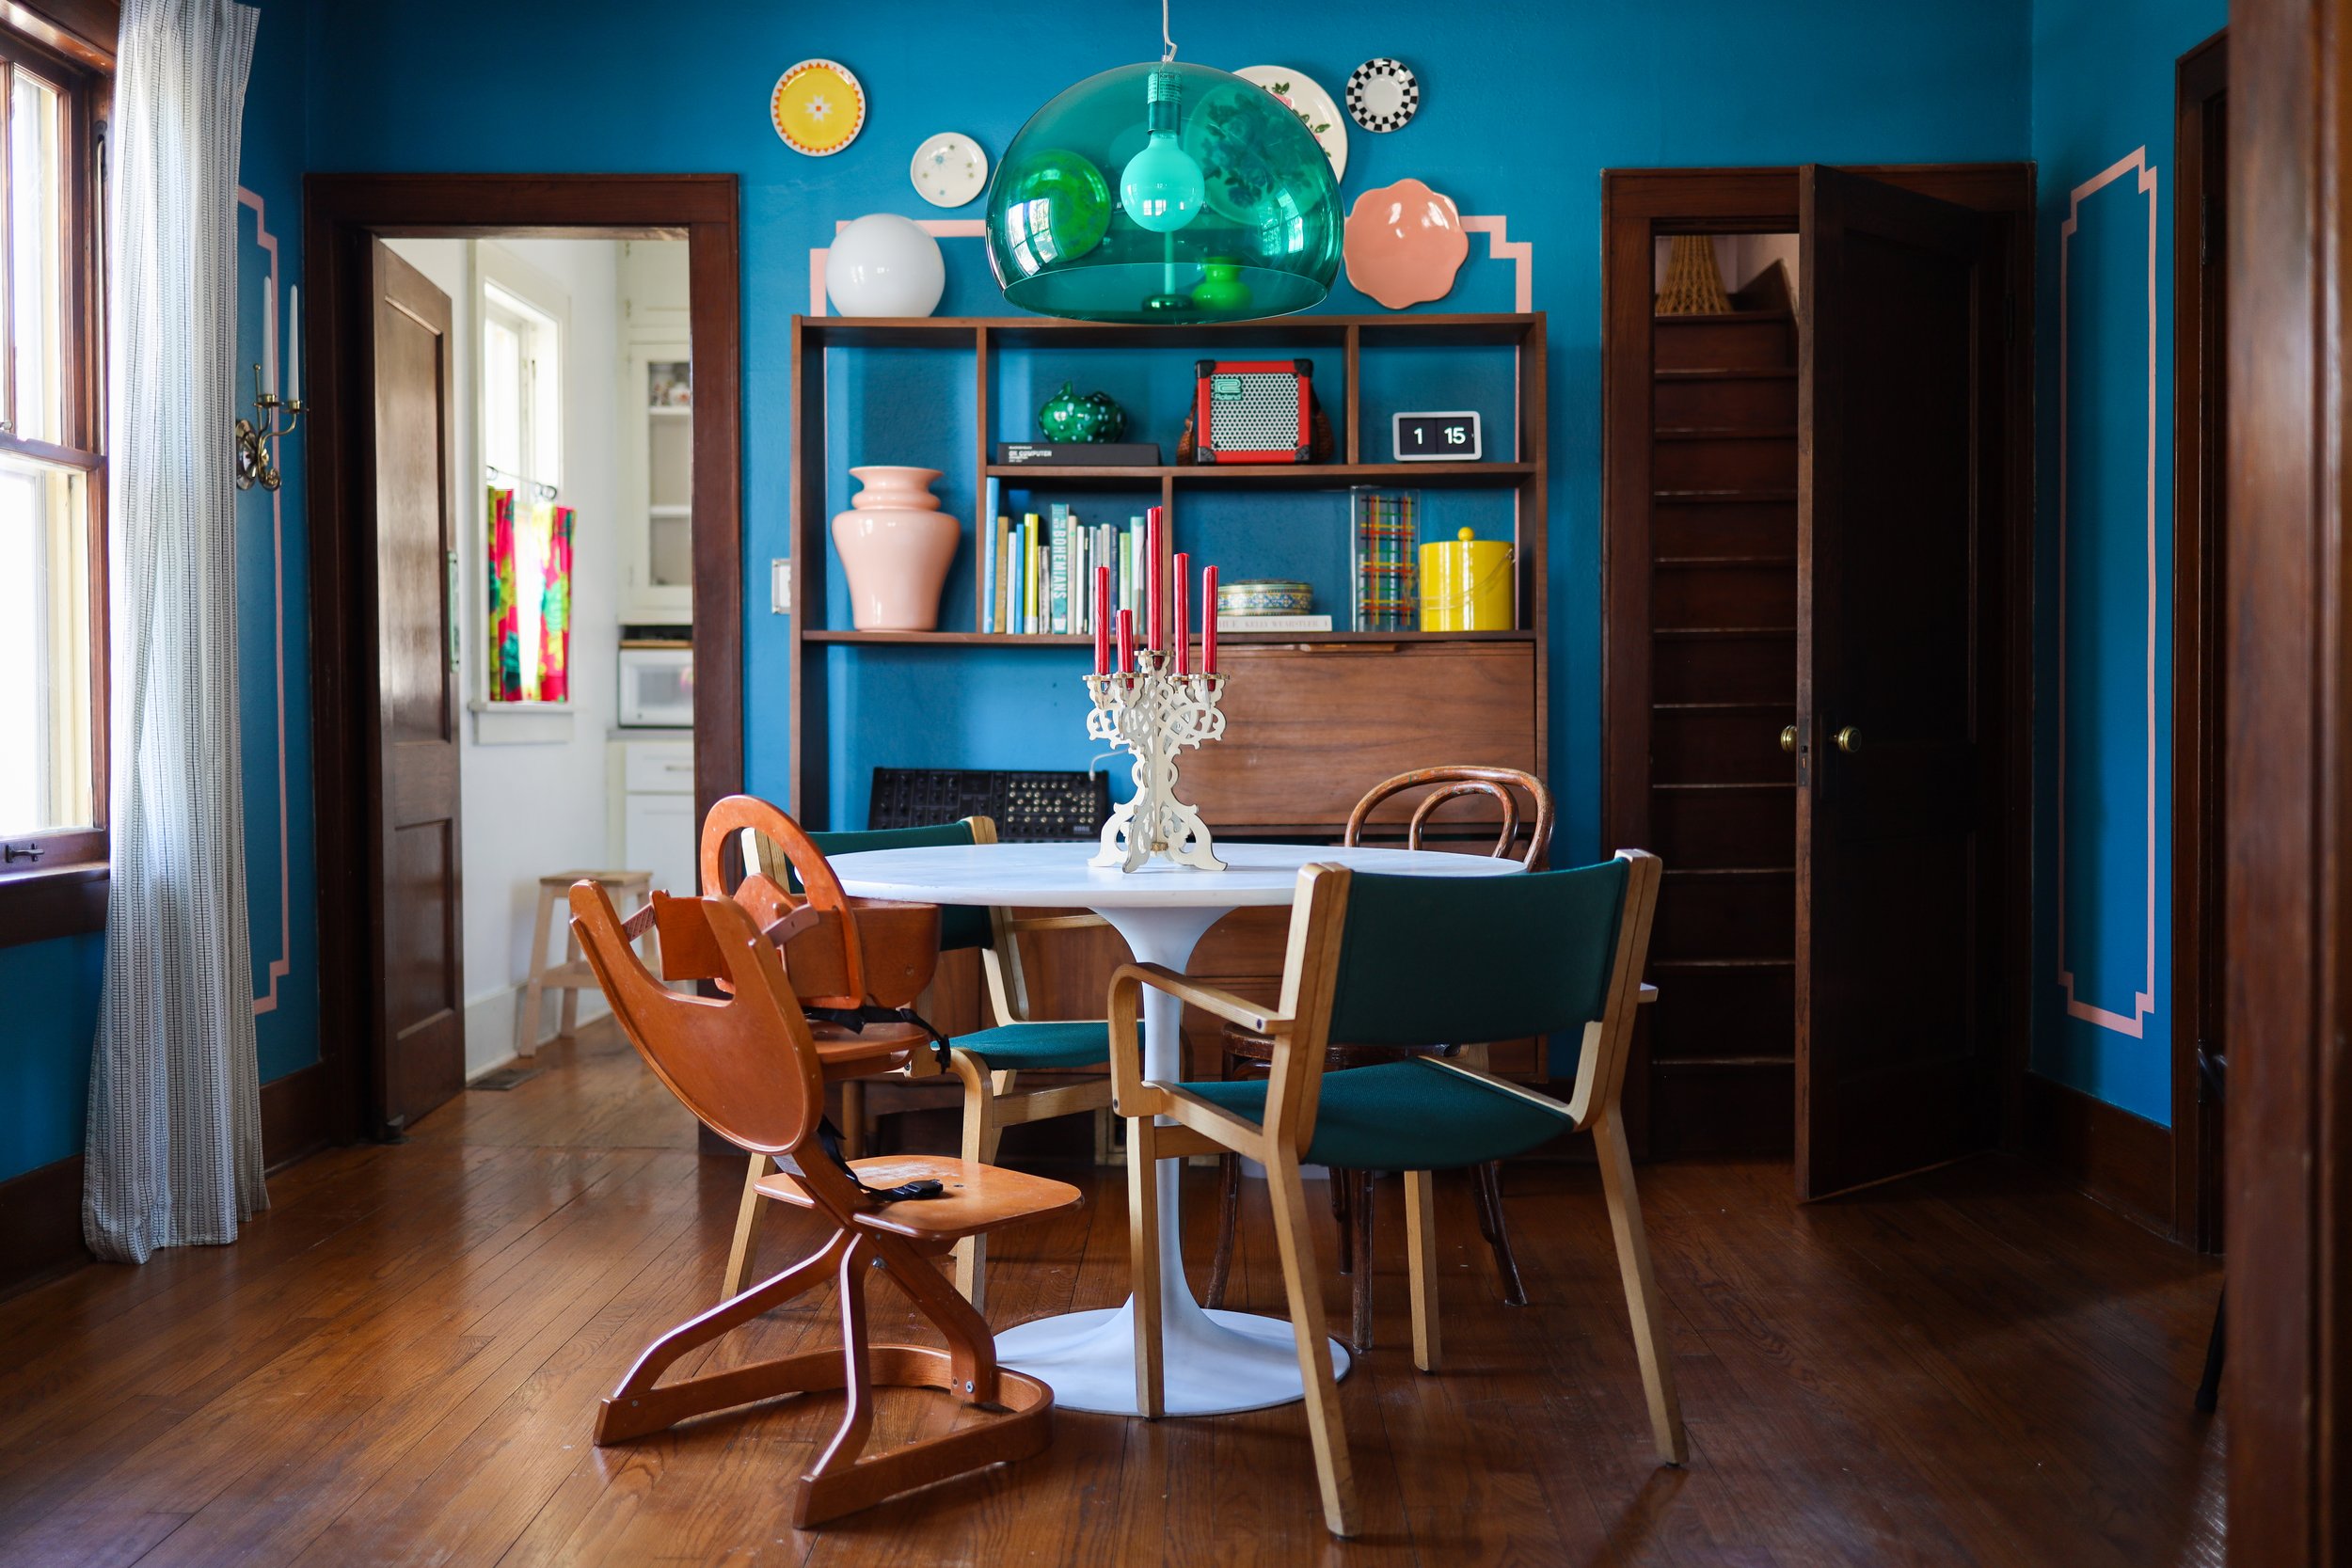

I love the look. It’s colorful and quirky. A nod to tradition, but playful. All the things I aspire to when decorating.
What do you think? Have you decorated with plates? Are you team traditional or mod?

Photography: (“After” images) Bethany Gilbert